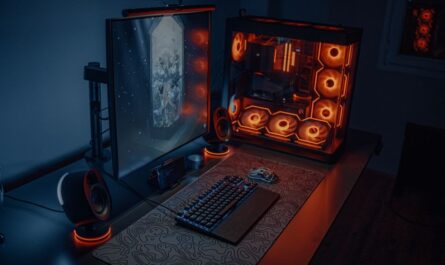
Building a budget gaming PC can be an exciting and rewarding endeavor, especially if you are a gaming enthusiast looking to maximize performance without breaking the bank. The process is not only cost-effective but also provides a deeper understanding of how each component contributes to your system’s overall efficiency. This guide will walk you through each step of assembling a budget-friendly gaming setup from scratch, ensuring that you get the most bang for your buck.
Why Build Your Own Gaming PC?
Constructing your own gaming PC allows you to tailor the system to your specific needs. It offers flexibility in component selection, enabling you to prioritize certain aspects like graphics or processing power based on the types of games you play. Moreover, building your own gives you the opportunity to upgrade parts over time, extending the system’s lifespan and keeping it at the cutting edge of technology.
Another compelling reason is cost savings. Pre-built gaming PCs often include a markup for labor and brand value. By choosing and assembling each part yourself, you can utilize resources such as sales or second-hand markets to find components at better prices.

Understanding the Components
Before diving into the building process, it’s critical to understand the core components of a gaming PC and their role:
1. Central Processing Unit (CPU)
The CPU is the brain of your computer, responsible for executing commands and processing data. For gaming, you’ll want a CPU that can handle multitasking effectively. Many budget builders prefer CPUs from lines like AMD’s Ryzen or Intel’s Core i-series, which offer a good balance of performance and value.
2. Graphics Processing Unit (GPU)
The GPU is crucial for rendering images, video, and animations. It’s especially important for gaming performance. Budget-conscious gamers might consider entry-level or mid-range GPUs from brands like NVIDIA or AMD, which provide solid performance for most games at medium to high settings.
3. Memory (RAM)
RAM is essential for smooth gameplay and multitasking. For budget builds, 8GB to 16GB of RAM is typically sufficient, allowing you to run most games without issues.
4. Storage
Solid State Drives (SSDs) offer faster load times compared to traditional Hard Disk Drives (HDDs). For budget builds, a combination of a smaller SSD for your operating system and key games, and a larger HDD for additional storage, is a common strategy.
5. Motherboard
The motherboard connects all the components of the PC. Ensure compatibility with your chosen CPU and RAM, and consider future-proofing options like additional RAM slots.
6. Power Supply Unit (PSU)
A reliable PSU is essential for stable system performance. Choose a unit with enough wattage to support your build, with some headroom for future upgrades.
7. Case
Your case houses all the components and affects airflow and cooling. Even budget cases can provide adequate cooling for your setup.
8. Cooling System
Consider additional cooling solutions if you plan on overclocking or live in a warmer climate. Stock coolers can suffice for budget builds unless you push your components to the limit.
Step-by-Step Assembly Guide
Once you’ve selected your components, it’s time to assemble your PC:
1. Prepare Your Workspace
A clean, static-free workspace is essential. Gather all your components and tools, including a screwdriver and thermal paste if not pre-applied to your cooler.
2. Install the CPU
Begin by installing the CPU onto the motherboard. Follow the alignment markers to ensure a proper fit, then secure it with the locking mechanism.
3. Attach the RAM
Insert the RAM modules into the corresponding slots, ensuring a snug fit. Most motherboards will have a dual-channel configuration, so consult your manual for optimal placement.
4. Mount the Motherboard
Secure the motherboard into the case, using standoffs to prevent direct contact with the metal. Align it with the I/O shield for a proper fit.
5. Install the GPU
Insert the GPU into the appropriate PCIe slot, securing it with screws to prevent movement. Connect any necessary power connectors from the PSU.
6. Connect Storage Drives
Mount your SSD and HDD into their respective bays, then connect them to the motherboard with SATA cables.
7. Connect the Power Supply
Place the PSU into its compartment and connect it to the motherboard, GPU, and storage devices, ensuring all cables are firmly seated.
8. Boot Up and Install OS
After verifying all connections, power on the system. Enter BIOS to confirm component recognition, then proceed to install your operating system and drivers.
Common Mistakes to Avoid
Building a PC can be complex, and avoiding mistakes can save time and frustration:

- Compatibility Issues: Always double-check compatibility of components, especially sockets and form factors.
- Insufficient Cooling: Ensure that your case and cooling solutions are adequate for your components’ power needs.
- Static Discharge: Use anti-static wristbands or mats to avoid damaging sensitive parts.
- Cable Management: Properly route cables to improve airflow and aesthetics.
Conclusion
Building a budget gaming PC is an enriching experience that can save money and provide a tailored gaming experience. By carefully selecting components and following this guide, you can build a system that meets your needs and grows with you over time. Happy gaming!

Unlock Full Article
Watch a quick video to get instant access.